 SECTIONS
Sample Flow to Apply a Change Request on Approval
This page describes a sample flow to automatically apply a change request once its Approval Status changes to "Approved".
Prerequisites
This sample flow has the following prerequisites:
- In the Flow Builder, go to the Toolbox and create a variable of Data Type = Text to store the ID of any credit note that is created when the change request is applied.
Name this variable
CreditNoteId.
- In the Flow Builder, go to the Toolbox and create a variable of Data Type = Text to store error messages.
Name this variable
ApplyChangeRequestErrorMessage.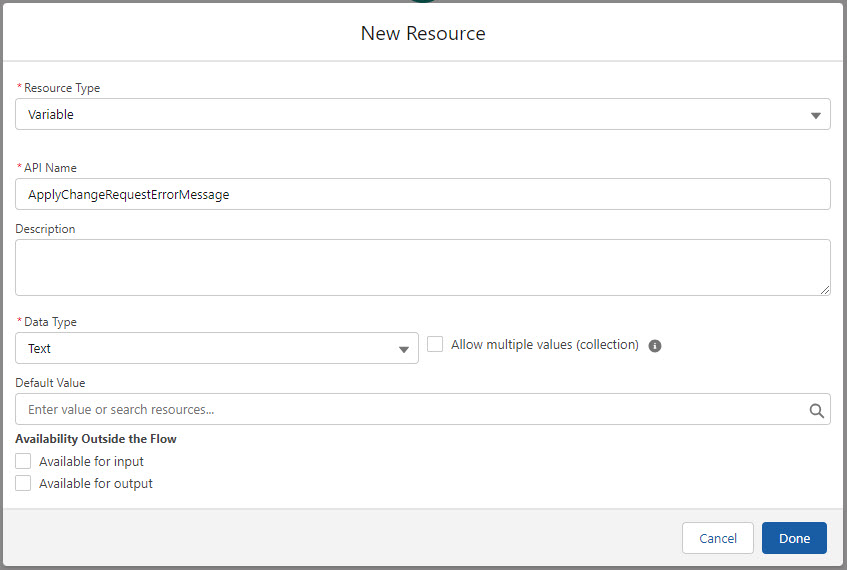
- In the Flow Builder, go to the Toolbox and create a variable of Data Type = Boolean to store the success/fail outcome of the action.
Name this variable
ApplyChangeRequestHasErrors.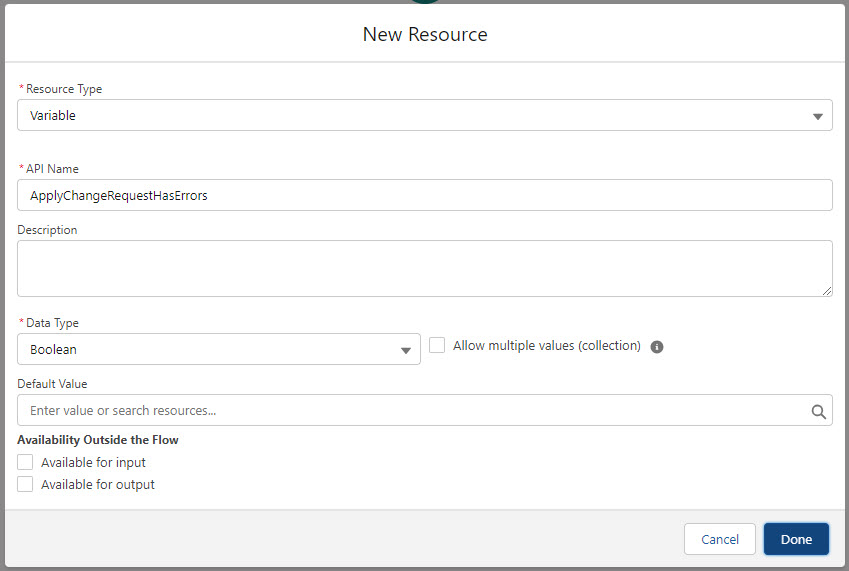
The Sample Flow
This sample flow is a is a Record-Triggered Flow that uses the Apply Change Requests action. There are three outcomes: a success outcome, a success outcome with a draft credit note created, and an error outcome. If a draft credit note is created or an error occurs, the flow notifies the user via a Salesforce task.

An explanation of each numbered item is provided in the table below.
| # | Flow Element | Sample Flow Suggestion | Sample Flow Setup |
|---|---|---|---|
| 1 |

|
Create a new Record-Triggered flow. In the Configure Start window, set: Object: Billing Contract Trigger the Flow When: A record is updated Condition requirements: All conditions are met (AND) Then add the following conditions:
When to Run the Flow for Updated Records: Only when a record is updated to meet the condition requirements |

|
| 2 |

|
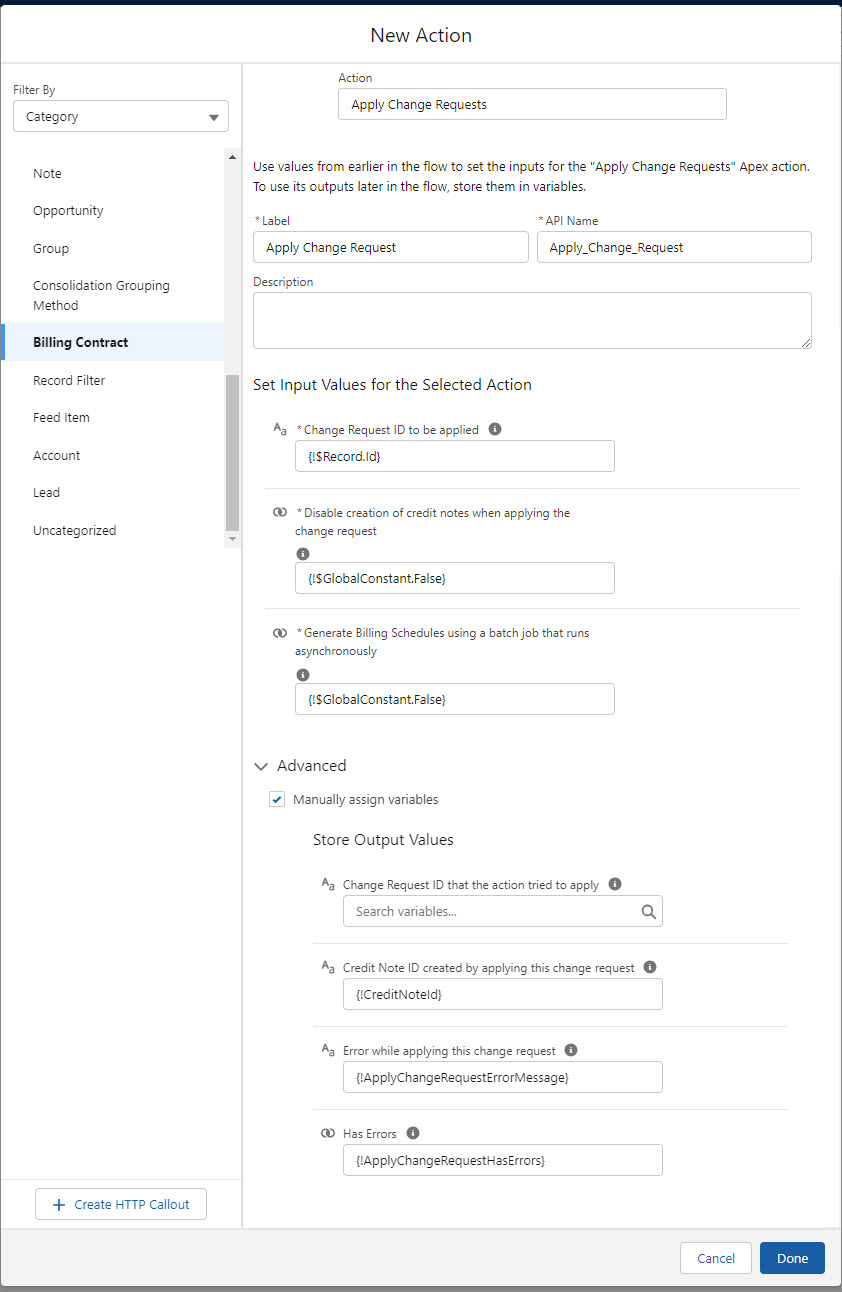
Add an Action element. Choose the Apply Change Requests action, then complete the input and output values. Set Input Values Change Request ID to be applied: Store Output Values - assign these to the variables you created in "Prerequisites". Credit Note ID created by applying this change request: Error while applying this change request: |
|
| 3 |

|
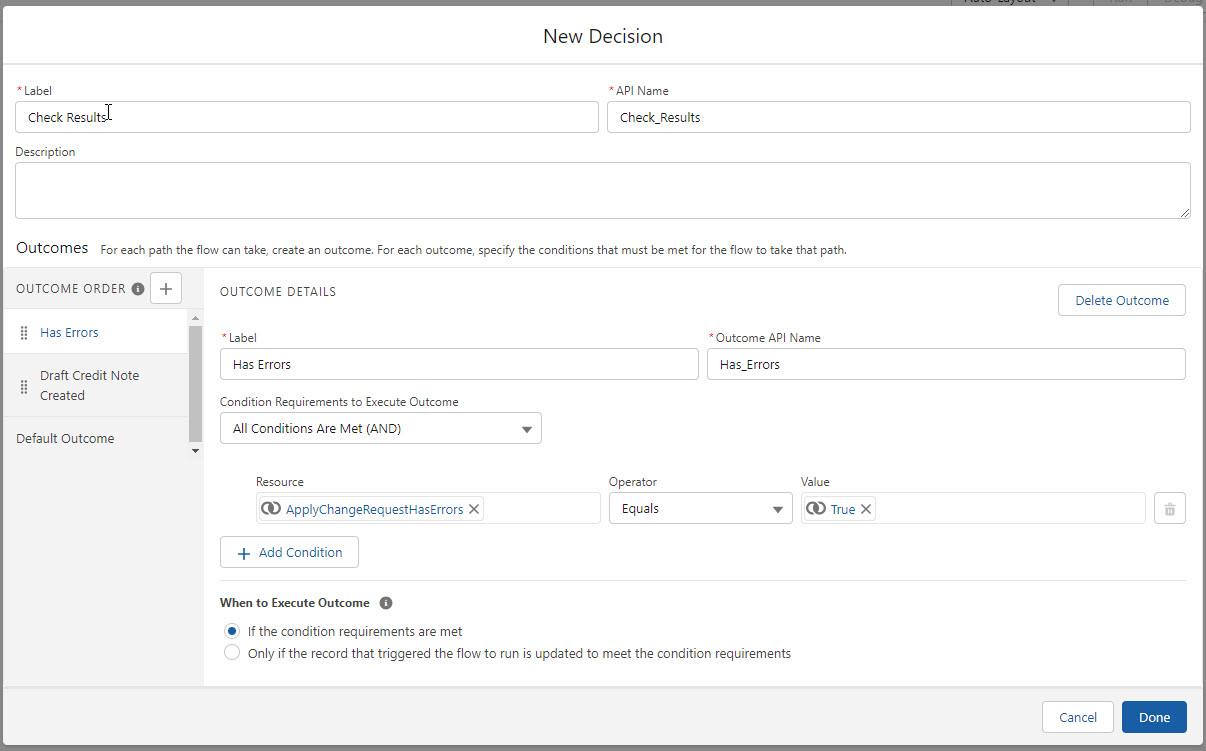
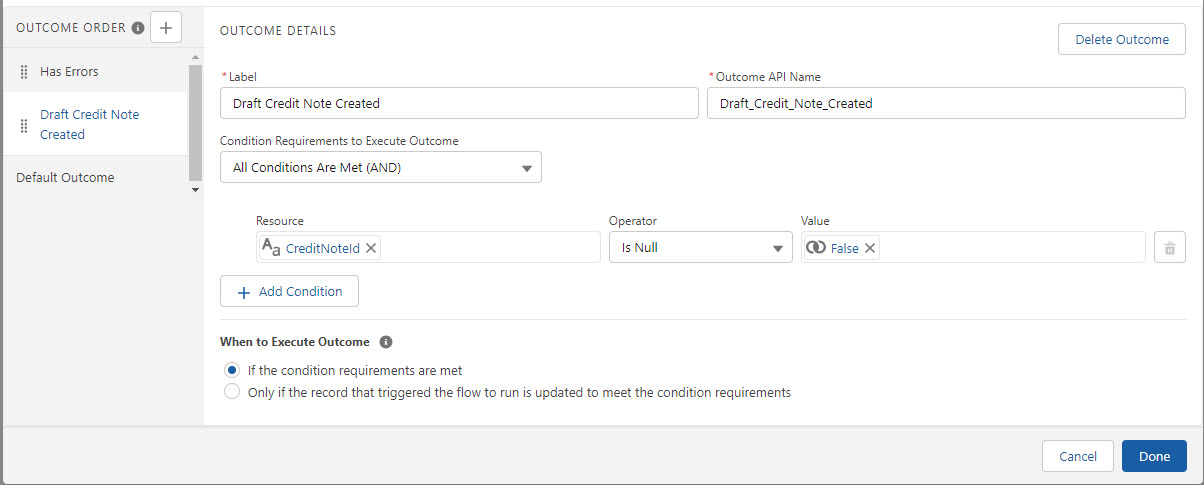
Add a Decision element to check for the results of the action.
Create a Has Errors outcome for if the Apex action returns an error. The condition for this outcome is:
Create a Draft Credit Note Created outcome for if the Apex action creates a draft credit note when applying the change request. The condition for this outcome is:
|
|
| 4 |

|
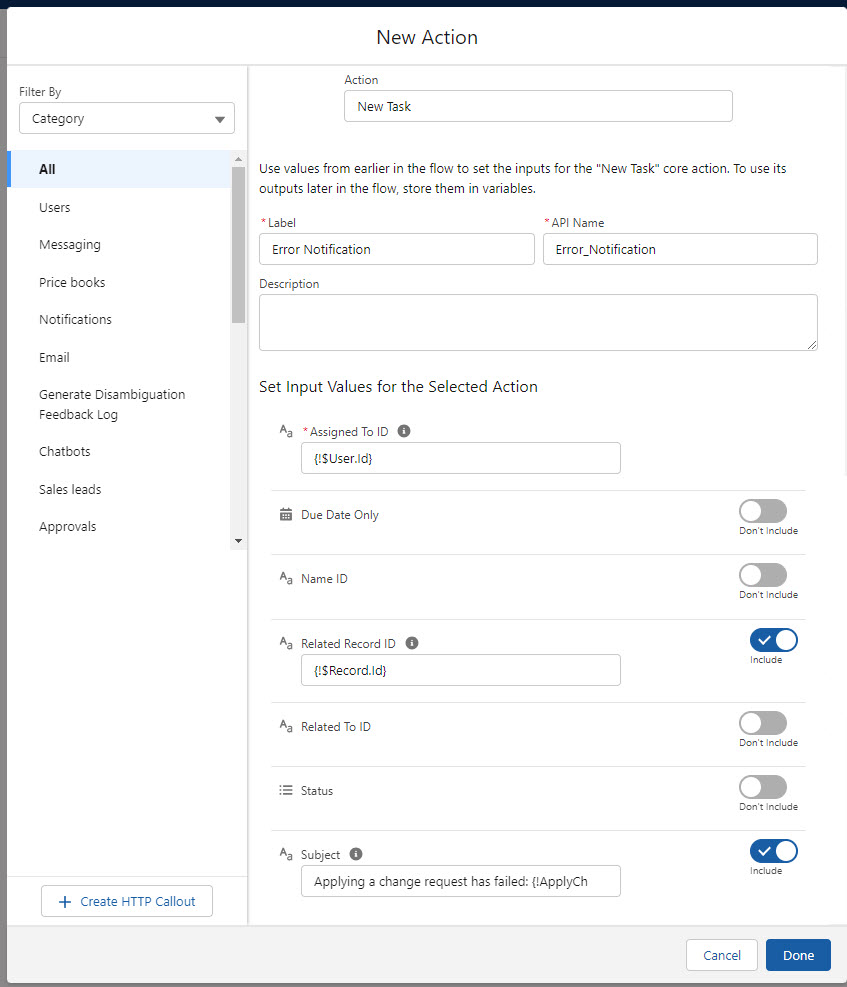
For the Has Errors outcome, add a New Task action then complete the input values. Set Input Values Assigned To ID: |
|
| 5 |

|
For the Draft Credit Note Created outcome, add a Get Records element. In the Get Records window, set: Object: Billing Document Condition requirements: All conditions are met (AND) Then add the following conditions:
|

|
| 6 |
|
Next for the Draft Credit Note Created outcome, add a New Task action then complete the input values. Set Input Values Assigned To ID: |

|
| 7 |

|
The Has Errors outcome, the Draft Credit Note Created outcome, and the default outcome are now ended. The Flow Builder might display the three outcomes finishing at the same End element, or at separate End elements. This makes no difference to flow behavior. | |
| Activate the flow | Remember to save and activate the flow to make it available for use. |