 SECTIONS
Every Jira instance is unique with custom Issue Types, Worklogs, and Fields. Most users want some custom Jira fields to be mapped to custom fields on their Project Tasks in PSA. Jira only supports custom fields on Issues and not on Projects or Worklogs.
The topic provides creating custom metadata records for custom fields for Jira Issue to PSA Project Task and vice-versa mode. The created custom metadata supports mapping for PSA Project Task to Jira Issue workflow and vice-versa and PSA Project to Jira Issue mode workflow.
Once you have created a custom field in Jira, we recommend creating custom metadata records to define objects for custom fields in Jira.
Example 1 - For Scalar Custom Field
A Scalar field in Jira is a text, date, or number entry. But not a dropdown or picklist, even if the values on that picklist are text, date, or numbers.
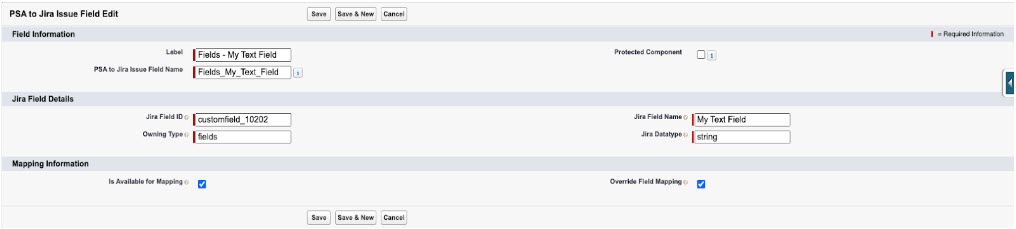
We assume that a custom text field in Jira with the label My Text Field and key customfield_10202 is set up. To enable this for mapping, we need to configure Certinia Help to know that this field exists.
- In Setup, click Custom Code | Custom Metadata Types.
- Next to PSA to Jira Issue Field, click Manage Records. A list of existing mappings is displayed.
- Click New. The new custom record page displays to create a custom field.
- In the Label field, enter Fields - My Text Field.
- Once you move to the next field, the PSA to Jira Issue Field Name automatically populates.
- In the Jira Field ID field, enter customfield_10202.
- In the Jira Field Name field, enter My Text Field.
- Next to Owning Type, enter fields.
- Next to Jira Datatype, enter string.
- Select the Is Available for Mapping checkbox to make this custom Jira field available for mapping.
- Select the Override Field Mapping checkbox to allow users to override the mapping for this field. By default, it is selected.
- Click Save. The new custom metadata record mapping field is now created.
The following image displays the metadata record.
Example 2 - For Non-Scalar Custom Field
A scalar field is like a summary represented as a value. But a picklist field in Jira is represented as an object. The value that we actually want to map is the value inside the object.
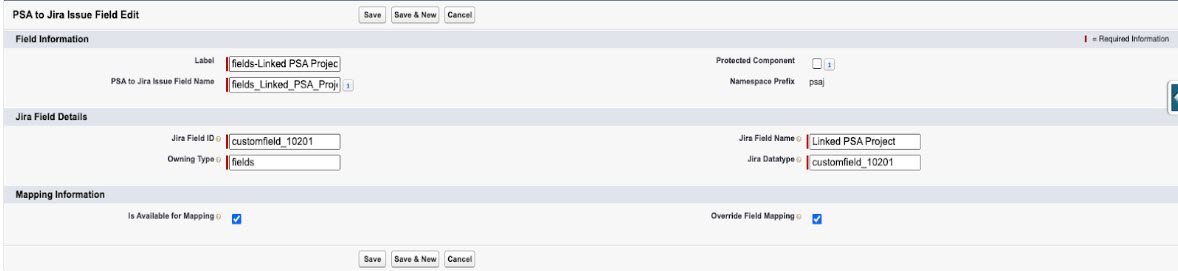
The first record is very similar to the scalar case in setting up a field within fields. The key difference is the datatype, which is set to the same as the Jira Field ID by convention. As this is not a recognized scalar datatype Certinia Help will treat this as a custom object type.
The following image displays the parent metadata record.
- In Setup, click Custom Code | Custom Metadata Types.
- Next to PSA to Jira Issue Field, click Manage Records. A list of existing mappings is displayed.
- Click New. The new custom record page displays to create a custom field.
- In the Label field, enter fields-Linked PSA Project.
- Once you move to the next field, the PSA to Jira Issue Field Name automatically populates.
- In the Jira Field ID field, enter customfield_10201.
- In the Jira Field Name field, enter Linked PSA Project.
- Next to Owning Type, enter fields.
- Next to Jira Datatype, enter customfield_10201.
- Select the Is Available for Mapping checkbox to make this custom Jira field available for mapping.
- Select the Override Field Mapping checkbox to allow users to override the mapping for this field. By default, it is selected.
- Click Save. The new custom metadata record mapping field is now created.
The following image displays the parent metadata record.
The image displayed the child metadata record.
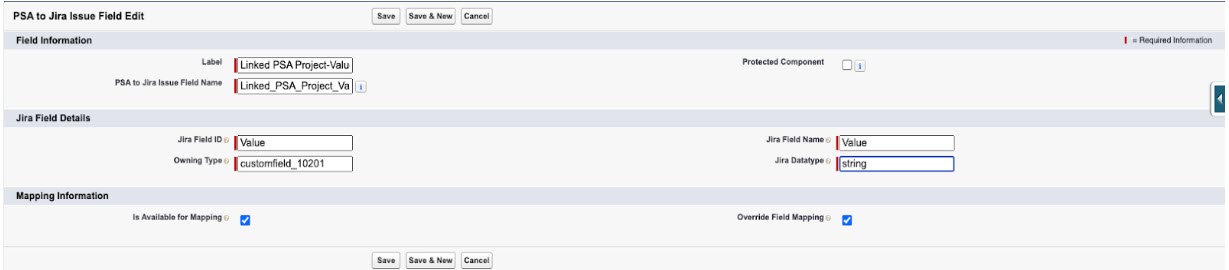
Now create a new custom record for a field that sets up the value within this custom object type. This is again similar to the scalar setup, but the owning type is set to customfield_10201, indicating that this field is in the custom object.
- In the Label field, enter Linked PSA Project-Value.
- Once you move to the next field, the PSA to Jira Issue Field Name automatically populates.
- In the Jira Field ID field, enter Value.
- In the Jira Field Name field, enter Value.
- Next to Owning Type, enter customfield_10201.
- Next to Jira Datatype, enter string.
- Select the Is Available for Mapping checkbox to make this custom Jira field available for mapping.
- Select the Override Field Mapping checkbox to allow users to override the mapping for this field. By default, it is selected.
- Click Save. The new custom metadata record mapping field is now created. You can now use the custom metadata records for mapping.
Example 3 - For Array Types Custom Field
Some fields like the built-in Components field, is of array type. That is, they can contain multiple values. In Certinia Help, there is the capability to handle this using the arrayFirst and arrayAll operators. These are part of Certinia Help and not the mapping system, so they are unavailable elsewhere. Only arrayFirst is currently implemented. arrayFirst takes the first element of the array and uses that to map from.
- In Setup, click Custom Code | Custom Metadata Types.
- Next to PSA to Jira Issue Field, click Manage Records. A list of existing mappings is displayed.
- Click New. The new custom record page displays to create a custom field.
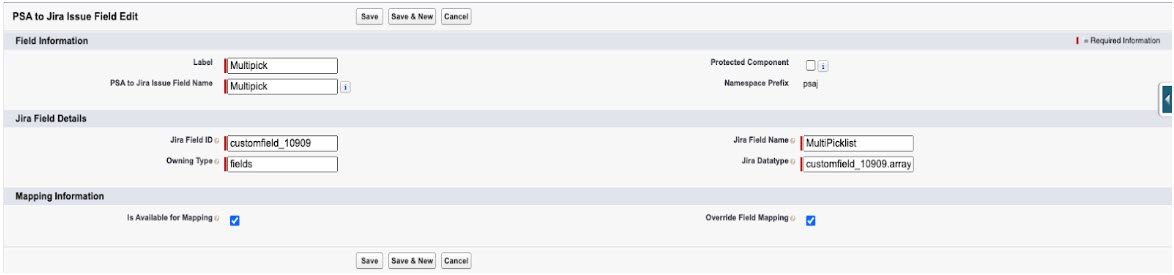
- In the Label field, enter Multipick when the field type is MultiPicklist.
- Once you move to the next field, the PSA to Jira Issue Field Name automatically populates.
- In the Jira Field ID field, enter customfield_10909.
- In the Jira Field Name field, enter MultiPicklist.
- Next to Owning Type. For example, enter fields.
- Next to Jira Datatype. For example, enter customfield_10909.arrayFirst when the field type is MultiPicklist.
- Select the Is Available for Mapping checkbox to make the field available for mapping.
- Select the Override Field Mapping checkbox to allow users to override the mapping for this field. By default, it is selected.
- Click Save. The new custom metadata record mapping field is now created.
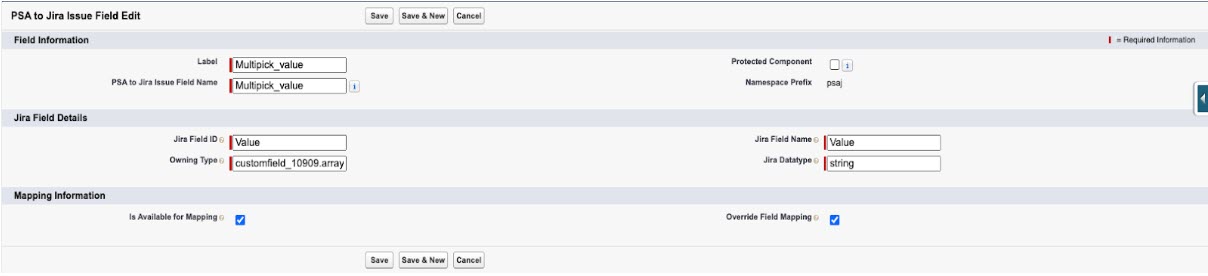
- Create a new custom record for a field that contains custom values such as drop-downs.
- In the Label field. For example, enter Multipick_value when the field type is MultiPicklist.
- Once you move to the next field, the PSA to Jira Issue Field Name automatically populates.
- In the Jira Field ID field, enter value.
- In the Jira Field Name field, enter value.
- In the Owning Type field, enter customfield_10909.arrayFirst.
- In the Jira Datatype field. For example, enter string.
- Select the Is Available for Mapping checkbox to make the field available for mapping.
- Select the Override Field Mapping checkbox to allow users to override the mapping for this field. By default, it is selected.
- Click Save. The new custom metadata record mapping is now created.
The following images display the Array Types Custom Field metadata record.
Example: Here is an example list of mappings for complex field values
Jira to PSA
| Jira Issue - Industry Value | PSA Project Task - Industry Value |
|---|---|
| Primary | First |
| Secondary | Second |
| Tertiary | Third |
PSA to Jira
| PSA Project Task - Industry Value | Jira Issue - Industry Value |
|---|---|
| First | Primary |
| Second | Secondary |
| Third | Tertiary |
For more information, see Creating a Data Transformation Table.
Note that PSA to Jira or vice-versa values will differ between different projects, depending on the values defined. The integration comes with a predefined set of mappings. We recommend customizing the predefined mappings to avoid errors when syncing from one system to another. To create a new mapping from Jira to PSA or vice-versa, see Creating a New Mapping.
For more information on the predefined mappings, see Customizing PSA Direct for Jira Field Mappings.
Depending on how you set up the Certinia Help, your PSA projects might be synchronized to Jira projects or vice-versa. When creating a Jira Issue, manually add the Jira custom field to Jira project and Jira project screens. Select the Jira custom field value, depending on the type of custom field you want to create. For example, select "primary."
The integration automatically creates a PSA project task for the Jira issue or vice-versa. Once the synchronization finishes, the Jira custom field populates with the value of the issue in Jira. For more information, see Synchronizing PSA Information to Jira .