SECTIONS
Using ClickLink Rules with Process Builder
The Process Builder helps to automate business processes and can run your ClickLink rules. For full details on working with Process Builder, see your Salesforce documentation.
To use a ClickLink rule with Process Builder:
- Create the ClickLink rule you want to use. See Creating a Rule for more information.
- Go to Setup and search for Process Builder. Click New.
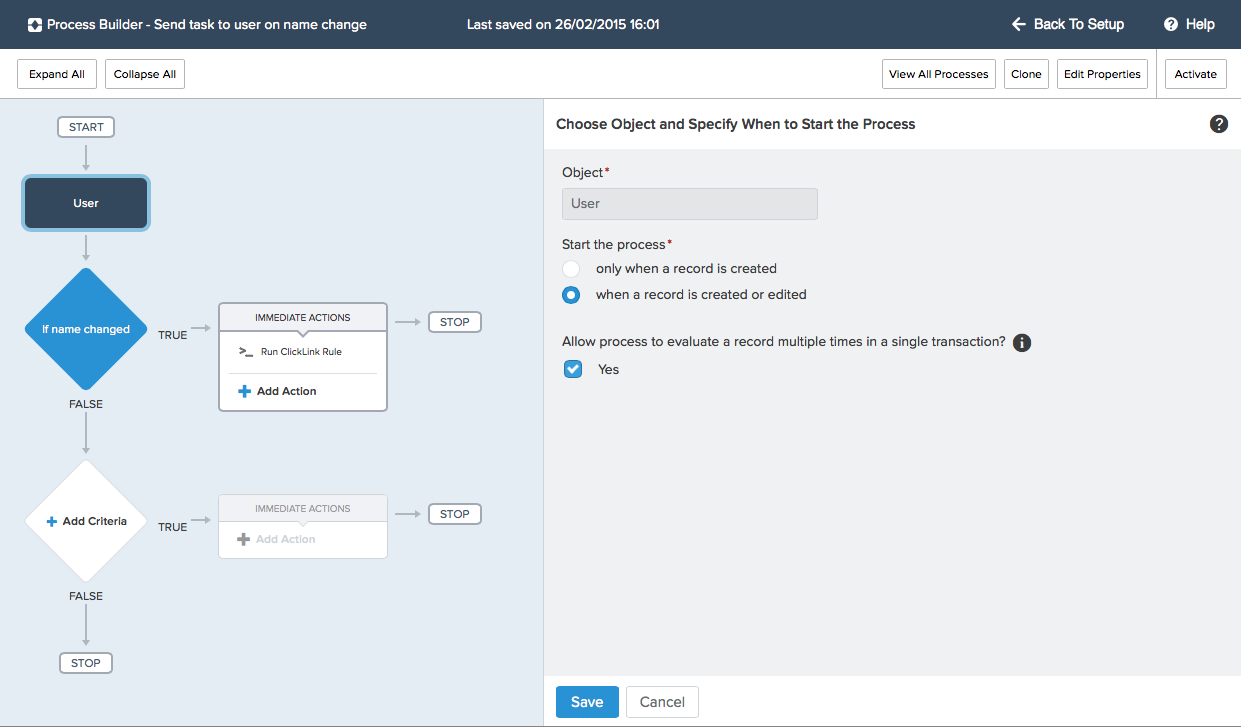
- In the Define Process Properties dialog box, enter the following:
Define Process Properties Fields Field Description Name Enter a name for the process. API Name Enter an API name for the process. Description Enter an optional description of what the process does. - Click Save. The Process Builder's flow chart opens. This is where you associate the process with the source object and specify when to start the process
- Click Add Object and enter the following:
Add Object Fields Field Description Object Select the source object. Start the process You can select to start the process when a record is created or when a record is created or edited. Allow process to evaluate a record multiple times in a single transaction? Select Yes to evaluate the object more than once in a transaction. 
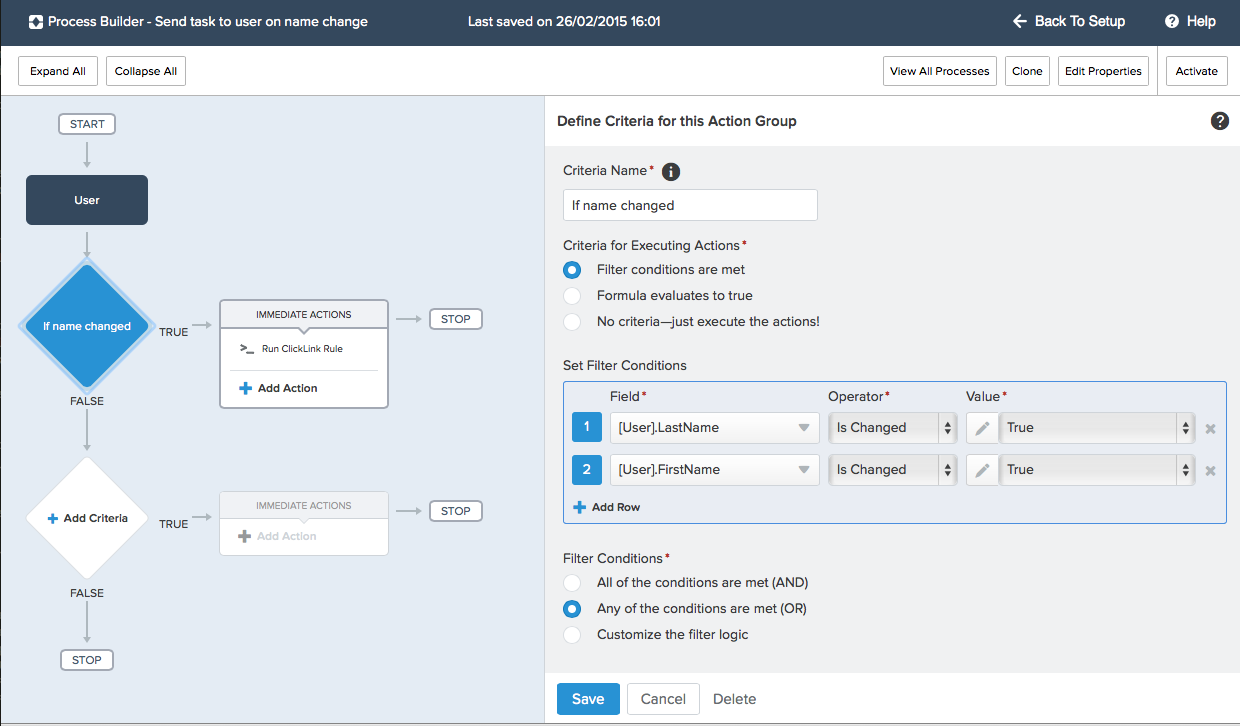
- Click Save. The next step in the Process Builder's flow chart is to define the criteria that must be true before the process can execute the ClickLink rule.
- Click Add Criteria and enter the following information:
Add Criteria Fields Field Description/Setting Options Criteria Name Enter a name that can help you differentiate between criteria in the process. Not applicable. Criteria for Executing Actions Filter conditions are met If you select this option, set the filter conditions and configure if all conditions (AND) or any conditions (OR) must be met.
If you need to evaluate more field values, click Add Row.Formula evaluates to true Specify the formula that must evaluate to true. No criteria – just execute the actions Select to execute the rule whenever a record is created or edited. 
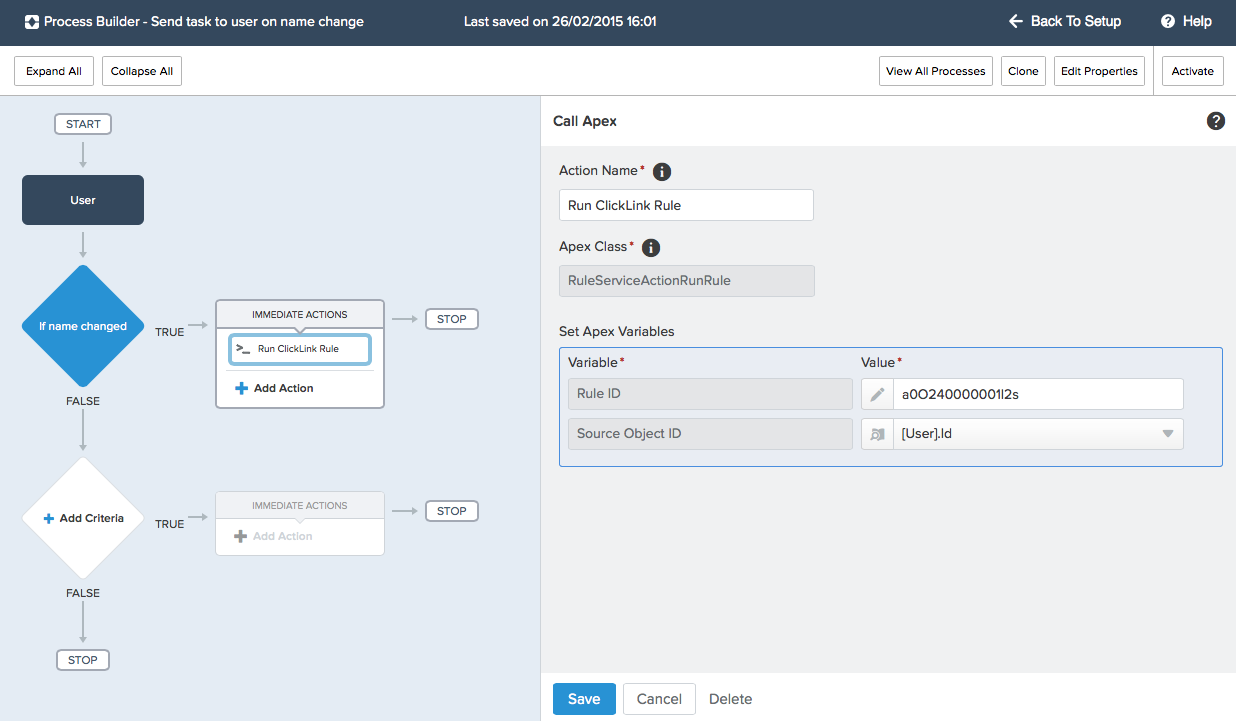
- Click Save. Now you can define the ClickLink rule to run when the criteria are met.
- Click Add Action and enter the following information:
Add Action Fields Field Description Action Type From the drop-down list, select Apex. Action Name Enter a name for the action. Apex Class From the drop-down list, select RuleServiceActionRunRule. Set Apex Values Rule ID – Enter the ClickLink rule's ID.
Source Object ID – Select the source object's record ID and click Save.
- Click Save. Add more criteria and actions as required.
- When the process is complete, click Activate and, when prompted, click OK to confirm you want to activate the process.