 .
.On the enhanced Billing Document Detail page you can view the Billing Document Details and the products and services that form the billing document line items. You can also add, edit and delete the billing document lines on the enhanced Billing Document Detail page. When you make changes to the billing document, the Document Total updates to reflect the changes.
If your products belong to active Salesforce Price Books, you can apply a price book to billing document line items if you create them from the enhanced Billing Document Detail page. For information about price books, see the "Prices and Price Books" topics in the Salesforce Help.
To restore the default layout:
.You can change the layout of the billing document lines on the Billing Document Detail page in these ways:
When viewing or editing a billing document, you can filter the list of products on the billing document by entering the first few characters of the product name in the Filter by Name box. To remove the filter, clear the Filter by Name box.
To move a column:
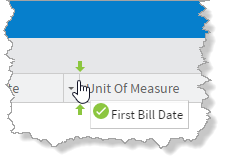
To the sort the lines by column, do one of the following:
 indicates that the lines are sorted in ascending order. The down arrow
  indicates that the lines are sorted in descending order.
 icon then select
  Sort Ascending or
  Sort Descending depending on whether you want to sort the lines in ascending or descending order.
To show or hide columns:
icon.