Managing Plan Lines
Use the Plan Lines tab to manage your plans and apply calculations.
Managing Rows and Columns in Plan Lines
To manage plan lines effectively, you need rows and columns in the table. The rows and columns are the basis for performing calculations and interpreting the data. You need to add new rows and columns to refine calculations and gain insights into the data and for that, the correct structure is important for maximizing data usefulness and ensuring accurate calculation, whether working with one or multiple plan lines.
 Inserting Rows and Columns
To insert rows in the plan table from the Plan Lines tab:
- Click
 | Insert Row or right-click the table where the dimensions are located and click
  .The Insert Row window appears. By default, a new row will be added to the bottom of the plan. To insert a row on a specific line, you must right-click.
 -
Fill out the values based on the dimensions. You can type and create a new dimension value or search and choose one from the list. Ensure that each value entered is unique and not repeated. The duplicated values will not be added to the table.
- Click Insert or Insert & New. The new row is added.
To insert columns in the plan table from the Plan Lines tab:
- Click | Insert Column or right-click the table where the measures are located and click
 . The Insert Column window appears. By default, a new column will be added to the bottom of the plan. To insert a column on a specific line, you must right-click.
 -
Fill out the values based on the measures. You can type and create a new measure value or search and choose one from the list. Ensure that each value entered is unique and not repeated, as duplicated values will not be added to the table.
- Click Insert or Insert & New. The new column is added.
Inserting Total Rows and Total Columns
To insert total rows in the plan table from the Plan Lines tab to get the total of all dimensions:
- Click | Insert Total Row or right-click the table where the dimensions are located and click
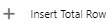 . The Insert Total Row window appears. By default, a new row will be added to the bottom of the plan. To insert a row on a specific line, you must right-click.
 -
Fill out the values based on the dimensions. You can type and create a new dimension value or search and choose one from the list. Ensure that each value entered is unique and not repeated. The duplicated values will not be added to the table.
- [Optional] Select the Include Calculations checkbox to include the calculations for the selected cells. For more information, see Calculations in Plan Cells.
-
Click Insert. The new total row will be added to the table in the appropriate hierarchy. If a record in the measure has been selected, a new total row will be added to the bottom of the selected measure. Each row in the plan table had a formula set up.
- Click Insert & New to add a new total row to the table in the appropriate hierarchy and add another total row.
To insert total columns in the plan table from the Plan Lines tab to get the total of all measures:
- Click | Insert Total Column or right-click the table where the measures are located and click
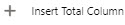 . The Insert Total Column window appears
 - Fill out the values based on the measures. You can type and create a new measure value or search and choose one from the list. Ensure that each value entered is unique and not repeated, as duplicated values will not be added to the table.
-
[Optional] Select the Include Calculations checkbox to include the calculations for the selected cells. For more information, see Calculations in Plan Cells.
- Click Insert. The new total column will be added to the table in the appropriate hierarchy. If a record in the measure has been selected, a new column will be added to the bottom of the selected measure.
- Click Insert & New to add a new total column to the table in the appropriate hierarchy and add another total column.
Deleting Rows and Columns
To delete a row from the plan table on the Plan Lines tab, perform one of the following:
- To delete one row, right-click the row and click Delete Row. The row is deleted.
- To delete multiple rows, select the checkbox next to the row and click
 . The row is deleted.
To delete a column from the plan table on the Plan Lines tab, perform one of the following:
- To delete one column, right-click the column and click . The column is deleted.
- To delete multiple columns, select one or more columns using the shift button on your keyboard, right-click the columns, and click Delete Columns.
Importing and Exporting Plan Lines
You can import and export plan lines using Microsoft Excel (XLSX) if you have permission.
For more information, see Importing and Exporting Plans.